

Guide to A good introduction to OneClick.
What Are Floating Palettes?
OneClick's Standard Palettes
How Does it Work?
What Can I Do With OneClick?
Working With OneClick
Don't Be Shy!
Is It Perfect?
|
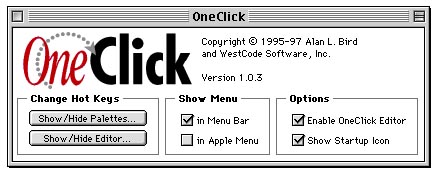 The OneClick Control Panel gives you a simple choice: you can have the OneClick menu show up on the Apple Menu or on the Menu Bar. I prefer it on the Menu Bar, but it's your choice. If you put OneClick on the Menu Bar, it displays as a small triangle graphic like this: Pulling down the OneClick menu gives you a list of installed palettes. Open palettes have a bullet by them; hidden ones do not. Palettes at the bottom of the menu, below the divider line, are application-specific -- that is, they belong to the currently active application. If you switch to a different program, those palettes won't be available. The upper palettes are global -- they're available in all applications.
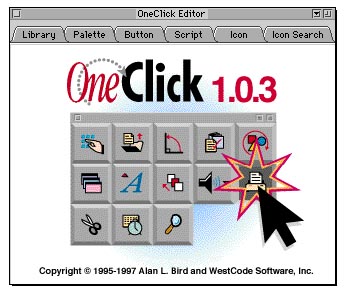
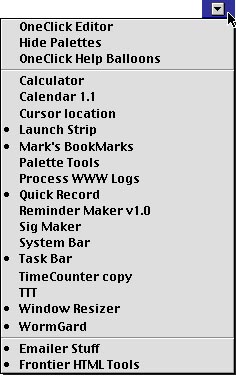 Selecting a palette from the OneClick menu opens or closes it. Even when a palette is closed its shortcut keys still work, so you don't necessarily need palettes open to use them. The most important OneClick command, however, is right at the top of the menu: OneClick Editor. Choosing that brings up the OneClick Editor, the main interface for creating, deleting, and editing palettes and buttons. The OneClick Editor is a multi-paned window -- below I explain the functions of each of the panes. You can move the OneClick Editor window wherever you'd like. You can change the size of the window as needed, and OneClick will remember the size and location the next time you open it. OneClick works well with multiple-monitor setups. When you are finished editing a palette or button, click the close box in the upper left corner of the OneClick Editor to close it.
About OneClick
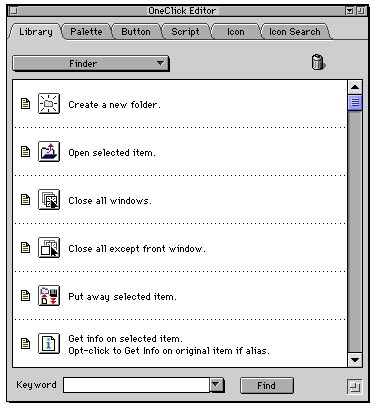
The Library
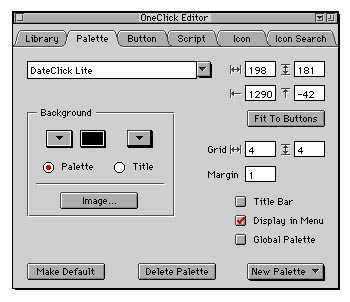
The Palette Editor An extremely important part of the Palette Editor is the "New Palette" popup menu at the lower right: it allows you to create new palettes, importing palettes from other sources (such as ones you download from the Button Circle website), and export your own palettes to disk (so you could give them to others). You should become familiar with these commands because they are powerful and important.
The Button Editor
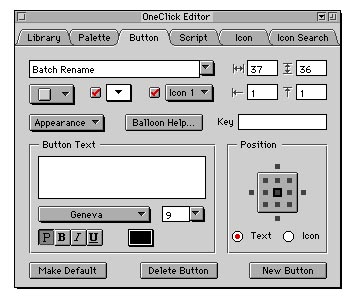
 Within the Button Editor you can add a text label, set the name of the button, change the size of the button and its position on the palette, edit the button's help text, and set the shape, style, and state (active, pushed, etc.) of the button. These changes take effect instantly so you watch what happens when you change things. Invisible buttons are visible while in the Editor, but as soon as you close the Editor, the button vanishes. Every single of these visual aspects of buttons can also be controlled via scripting -- making OneClick incredibly powerful.
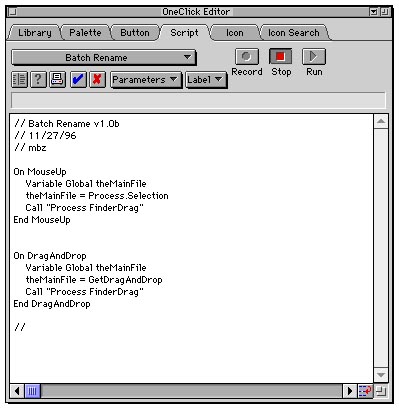
The Script Editor
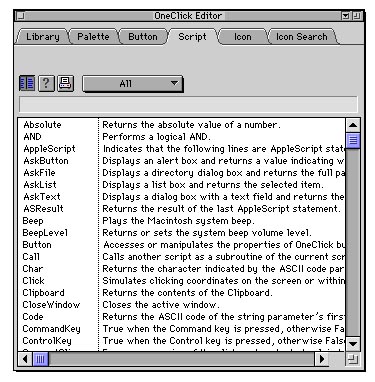 My favorite feature of the Script Editor are the Script Help buttons. Clicking the leftmost help button brings up a list of all of the commands OneClick understands. There's a brief one-line description. For more detail, click on one of the commands in the list. The other help button (the one with the question mark icon) is really cool. If you highlight a command in your script and click on the help button, it takes you right to a description of that command. For instance, in the above script I highlighted the function "getDragAndDrop" and clicked the question mark. Here's what came up (the window can be resized and scrolled).
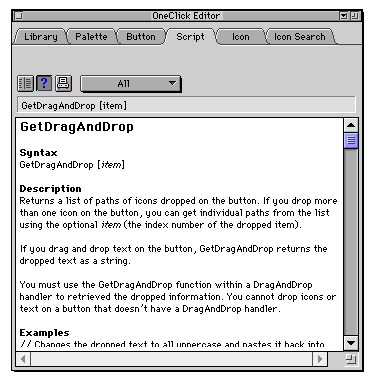 Within this help text (which is impressively comprehensive, though not perfect), you can select text and copy it. This is great as the text often includes sample scripts which you can paste back into your own script and simply change slightly. This is basically how I learned OneClick programming -- I explored the commands in this online help file and immediately tried them out in test scripts. I've used many other scripting languages, but none compare to OneClick in its unique blend of simplicity, power, elegance, and online help.
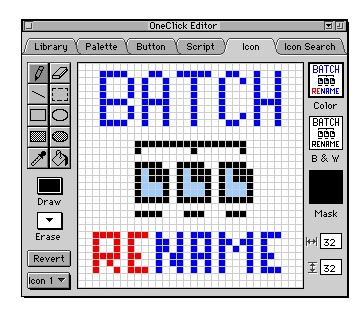
The Icon Editor Within the Icon Editor pane, you can draw anything you like. The maximum size for an icon is 32 by 32 pixels. You have a nearly full toolbox of editing tools: pencil, rectangle, circle, paintbrush, and eraser. You can use any color from the Mac's 256-color system palette. The only things you can't do that I miss, are flip and rotate.
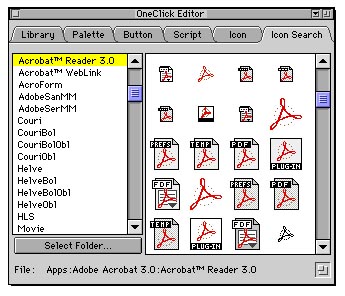
Searching for Icons
|